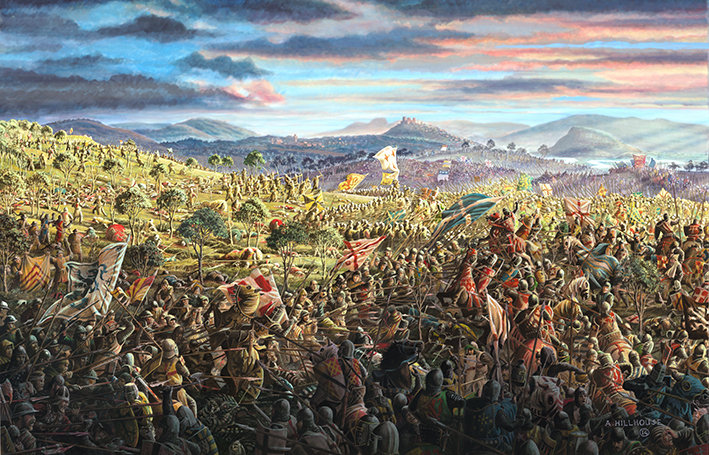
A painting that compresses all the main events of the second day of the battle. The Scots’ forces first appeared to the English along the low ridge, at the upper left of the painting, where the knelt to pray. Seeing them kneel, the English King, Edward II, called out “Ha! They kneel for mercy!” misunderstanding their intent. The Scots then stood up and marched in their schiltrons down the hill, straight towards the massing English knights, under cover from their own archers. The English archers reacted swiftly, however, and quickly drove the few Scots archers from the field. Beneath this ridge is the line of casualties where the two armies first clashed. The well drilled Scottish lines held at the impact of the poorly organised English cavalry, however, then began driving back the English in a relentless, murderous, crushing slog. The lines were packed so closely together that English support from their archers quickly became impossible.
In the lower left of the image, two Scottish soldiers can be seen holding aloft the standard of the English Earl of Gloucester, taunting the English lines. Gloucester had been stung by accusations of cowardice from his own king the day before. Subsequently, upon seeing the Scots’ advance, he hastily formed up the vanguard of the English cavalry and charged without even pausing to don his own surcoat. With great bravery, he charged the Scottish lines but went down under the spears of Edward Bruce’s men. Without his surcoat, he was not recognised as a potentially valuable hostage and was killed by the rampaging Scots. Behind these two characters, Scottish foot soldiers take English knights hostage.
In the far distance, to the right hand side, men can be seen running from horses. The English had redeployed their now redundant archers across the Pelstream Burn, on the Scots’ left flank, where they wreaked total havoc amongst the Scotsmen under the command of the Black Douglas and Walter the Steward. But the Bruce had foreseen just such a development and deployed the Scots light cavalry under Sir Robert Keith in a circuitous movement to dispatch them. Unseen by the English, they tracked swiftly through the concealing countryside to take the English archers by surprise and drove them from the field.
In the centre of the painting can be seen the huge Lion Rampant, the position of King Robert. It was at this point that the Bruce deployed his own schiltron, with support from Angus Og MacDonald and his highlanders, who he had previously held in reserve. As they smashed into the thick of the battle, the English began to lose heart. They were being driven back mercilessly and yet most had been unable to reach the front line to strike a blow. They could not manoeuvre effectively in the tight confines and on such broken terrain. Many fell beneath the crush, never to rise again and panic began to surge through their ranks.
English King Edward was persuaded to leave the field by his advisers as order in the English ranks collapsed and he fled for nearby Stirling castle with his escort. Upon seeing the Royal Standard, three golden leopards on a scarlet background, leaving the field, the English collapse became inevitable as depicted in the right hand side of the painting.
The Scottish archers returned to the field to wreak havoc upon the fleeing English. The “small folk” abandoned their reserve position by Coxet Hill and took to the field. It is unlikely that Robert the Bruce ordered this charge, but its effect was devastating upon the already retreating English forces. Seeing these hundreds of figures rush into battle carrying workmen’s tools as weapons and waving homemade banners, the English mistook them as another Scottish reserve force entering the fray. Subsequently, they totally disintegrated and fled the field, pursued in every direction by vengeful Scots. The rout was complete. King Edward eventually reached English occupied Stirling Castle but was refused entry by the castle commander, Sir Philip Moubray, as this would only have resulted in the King’s ultimate capture. He and his retinue were pursued relentlessly south and east to Dunbar by the Black Douglas.